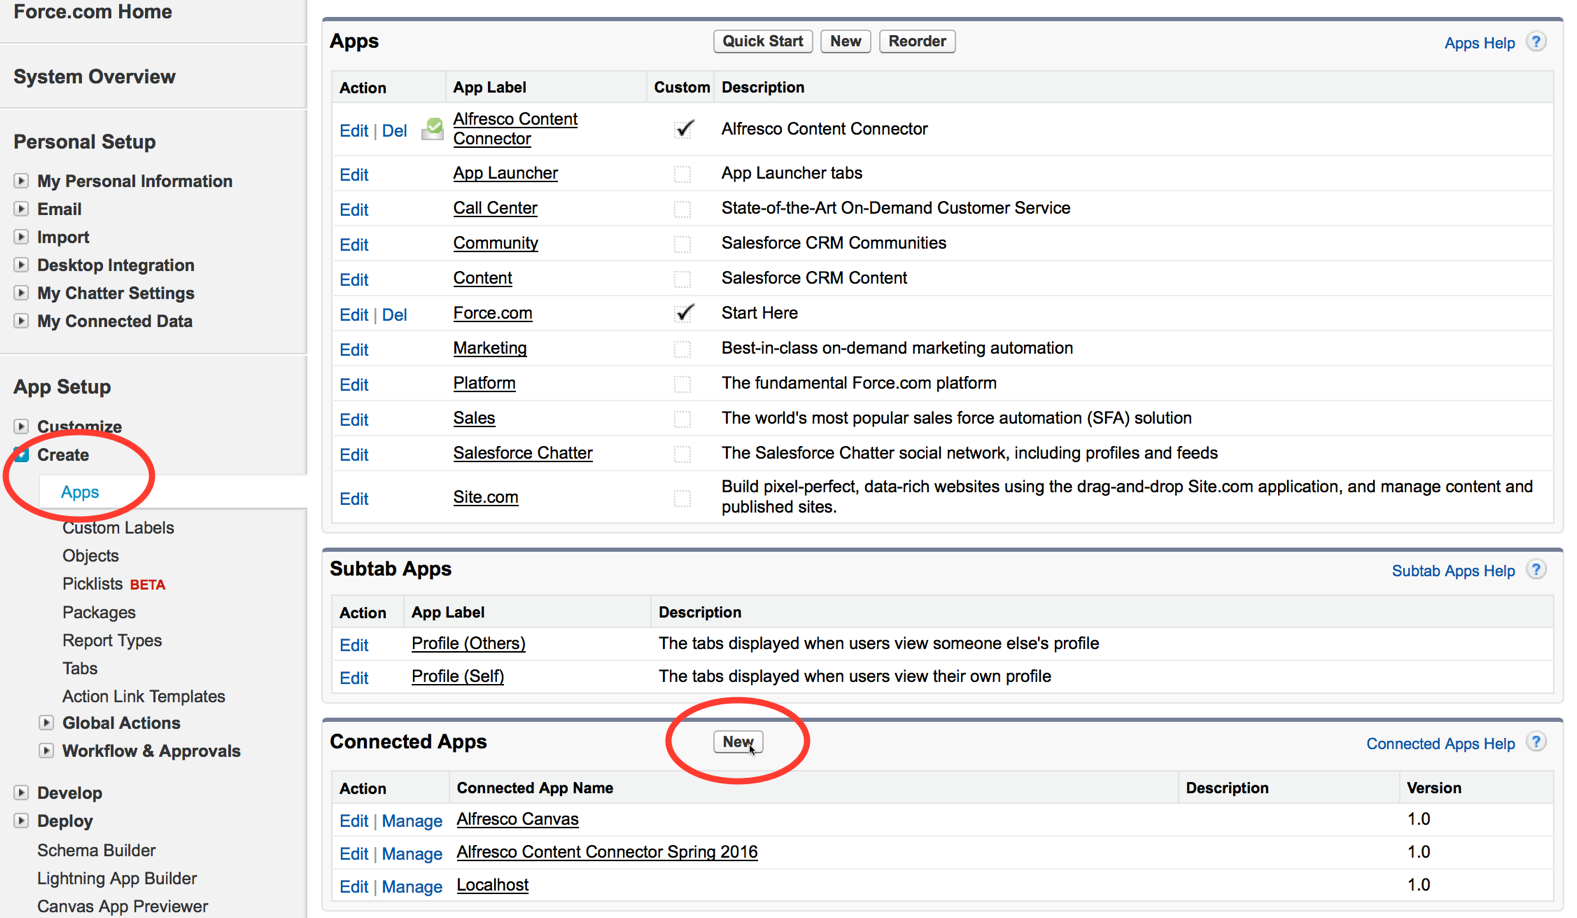
After you've installed the app, create a new connected app definition using the
Salesforce Setup menu.
Make sure that you've downloaded the SkyVault Content Connector app, as described here:
Installing the app in Salesforce. In
this task, you'll use the Setup menu in Salesforce to customize the
install. You need administrator rights to make these changes.
-
In your Salesforce account, find Setup. This is often on the
toolbar or under your name (see How to find Setup for more guidance on where to find
this).
Search for Apps in the Quick Find search bar, and in App Setup click Create > Apps to see your installed apps.
-
Scroll down to Connected Apps and click New
to create a new connected app.
This new app extends the standard connector to work for your organization. Use the following settings: />
/>- Connected App Name: Name your app something memorable and unique; for example, SkyVault On-Premise
- API Name: Choose a meaningful name. This is the
name used by the API and managed packages.Note: The default is SkyVault_Content_Connector_for_Salesforce. You'll need to remember the API Name when you configure the SkyVault Setup tab.Note: If this is not set up correctly, you'll see an error message. See Troubleshooting for guidance.
- Contact Email: Enter an administrator email address.
- Check Enable OAuth Settings.
- Callback URL: this field is not used, but does need to be completed. You can set this to https://www.alfresco.com/dummy_callback.
- In Selected OAuth Scopes add the following scopes:
- Full access (full)
- Perform requests on your behalf at any time (refresh_token, offline_access)
- Check Force.com Canvas.
- In Canvas App URL, enter a secure (https) URL that points to
the SkyVault Share environment, that you have configured with the SkyVault Content
Connector. You also need a suffix of
share/page/sfdc/canvas/signedrequest. For example:
https://localhost:8443/share/page/sfdc/canvas/signedrequest
- Access Method: Select Signed Request (POST)
- Add these Locations:
- Chatter Tab
- Layouts and Mobile Cards
- Visualforce Page
- In Lifecycle Class, look up the options and select SkyVaultCanvasLifeCycleHandler.
- Click Save to save your settings.
- For the new connected app, click Manage to set permissions and accessibility.
-
In the OAuth policies section, enter these values:
-
Permitted Users: Select Admin approved users are
pre-authorized.
Click OK to accept the Salesforce message.
- IP Relaxation: Select Enforce IP restrictions.
- Refresh Token Policy: Select the Refresh token is valid until revoked radio button.
- Save your settings.
-
Permitted Users: Select Admin approved users are
pre-authorized.
-
In the Manage Profiles section, click Manage
Profiles, check the required profiles, and Save your
settings.
For example, select System Administrator and Standard User. We will now find the consumer secret ready to paste into SkyVault.
