-
Log in to your PingFederate administrative console as the administrator.
The URL is in the format:
https://<DNS_NAME>:9999/pingfederate/app
where <DNS_NAME> is the fully qualified name of the machine running the PingFederate server.Three sections are displayed: IdP Configuration, Server Configuration, and SP Configuration. We will be working with the IdP Configuration section.
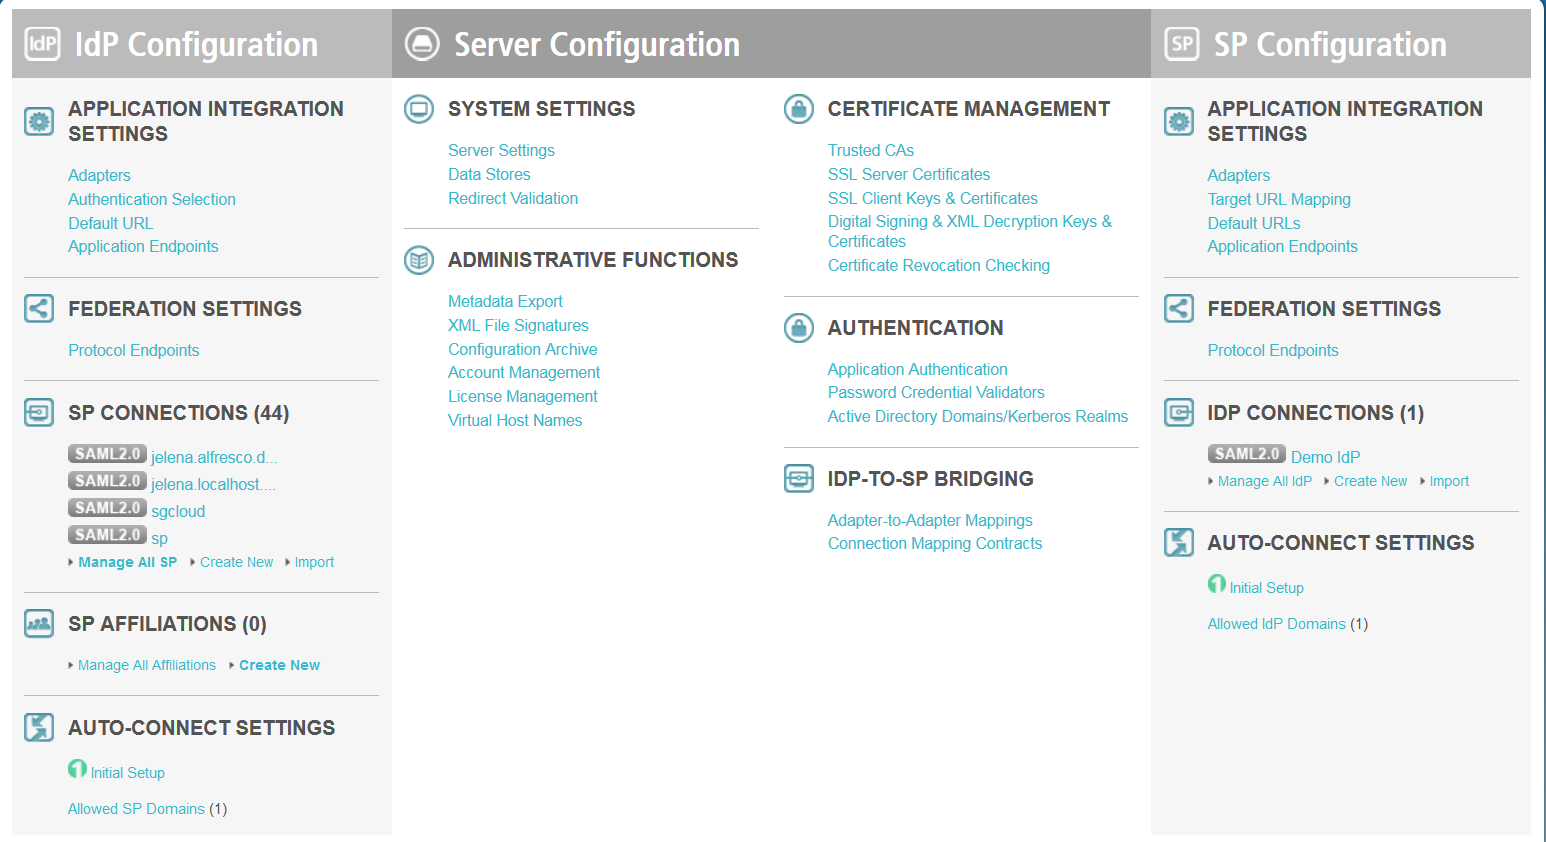
- In IdP Configuration > SP Connections, click Create New to create your service provider connection (in this instance, SkyVault is your service provider).
-
Enter information in each of the following tabs to set the type of connection you want
to establish between PingFederate and SkyVault.
These are the tabs you will see when you click Create New:

- Connection Type: Select the Browser SSO Profiles check box and click Next.
- Connection Options: Select the Browser SSO check box and click Next.
-
Import Metadata: Use this tab to import metadata file from
SkyVault SP describing this new connection.
- In a new browser window, log in to the Admin Console SAML SSO page as an
administrator:
http://localhost:8080/alfresco/service/enterprise/admin/admin-saml
where localhost:8080 is your SkyVault host name and port. - Click Download SP Metadata.
- Save the file.Note: You'll set up the Admin Console settings for SAML in a later task, but we need this metadata file to share information about SkyVault.
- In a new browser window, log in to the Admin Console SAML SSO page as an
administrator:
-
Set these values in the General Info tab:
- Specify the Partner's Entity ID (Connection ID) and the Connection Name for your connection.
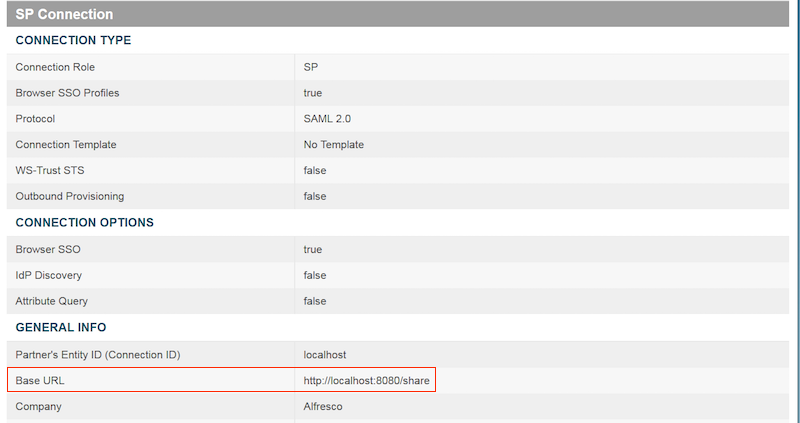
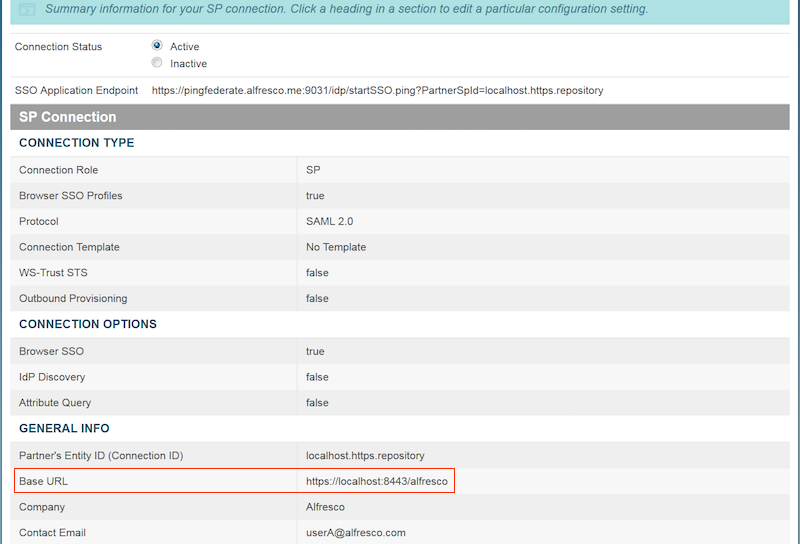
- Ensure that the Base URL is pointing to your service
provider. For example:
-
If you are using SkyVault Share:
http://localhost:8080/share
- If you are using REST API or AOS:
http://localhost:8080/SkyVault
-
- Optionally, you can also provide contact information.
- Set the level of transaction logging you need for SkyVault. Ensure that Standard is selected as the Logging Mode.
- Click Next. Note: You can save the configuration by clicking Save Draft. You can then retrieve it by selecting Manage All SP from SP Connections on the main administrative console page.
- The Browser SSO tab has a number of sections to complete. Click Configure Browser SSO and complete the following steps on each of the Browser SSO tabs.
-
Use the Browser SSO section to setup message transfers between
SkyVault and PingFederate.
-
Select all four available profiles on this tab and click
Next.
SAML Profiles: SkyVault uses all the SSO and SLO profiles available.
-
Assertion Lifetime: Accept the default and click
Next.
This sets the time for which an assertion is valid. A SAML assertion is an XML document that contains authentication, authorization, and attribute information. Each assertion has validity time period.
-
Click Configure Assertion Creation in the
Assertion Creation tab.
Configuring assertions involves specifying how PingFederate obtains user-authentication information and uses it to create assertions for SkyVault. This includes choosing an identity mapping method, defining the attribute contract for SkyVault and configuring adapters.

- Identity Mapping: Ensure that the Standard mapping is selected and click Next.
-
Enter the following information for the Attribute
Contract:
- Choose
urn:oasis:names:tc:SAML:1.1:nameid-format:unspecified as
the subject name format for the SAML_SUBJECT attribute contract.Note: The contract includes the default SAML_SUBJECT, which identifies the user in the assertion. This is because you used the standard identity mapping.
- Extend the Contract by adding an email part to it. Type Email in the Extend the Contract text box.
- Choose urn:oasis:names:tc:SAML:2.0:attrname-format:basic as the attribute name format and click Add. The details are added.
- Click Next.
- Choose
urn:oasis:names:tc:SAML:1.1:nameid-format:unspecified as
the subject name format for the SAML_SUBJECT attribute contract.
-
Select all four available profiles on this tab and click
Next.
-
In Authentication Source Mapping, click Map New Adapter
Instance, and complete the following steps for the IdP Adapter
Mapping tabs.
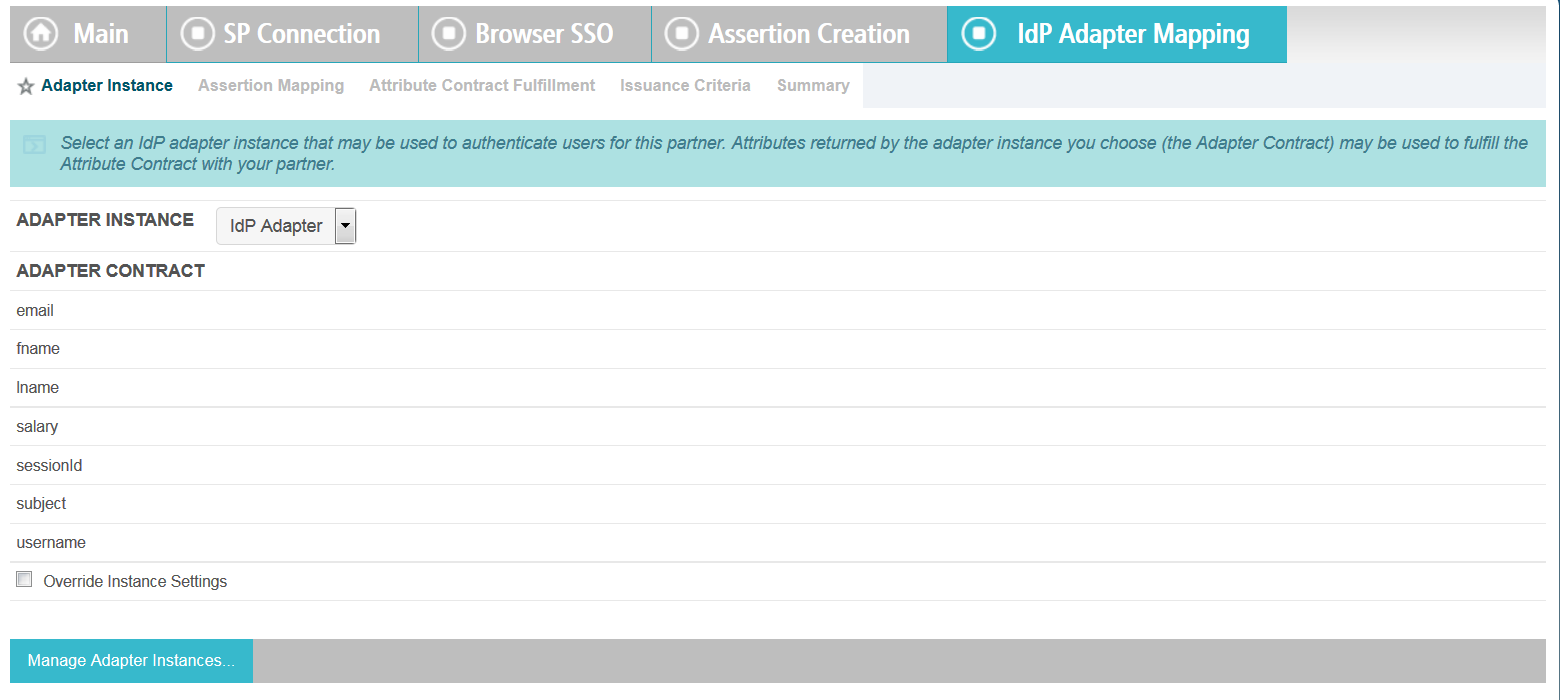
IdP adapters are used for user authentication in the Single Sign-On process. When an SkyVault user enters credentials, the user attributes are returned to PingFederate.
-
Adapter Instance: Select IdP Adapter
from the Adapter Instance menu and click
Next.
An adapter instance is a configured and deployed adapter.
-
Assertion Mapping: Ensure Use only Adapter
Contract values in the SAML assertion is selected. Click
Next.
Setting up assertion mappings involves defining data stores that you want to use to look up adapter contract values.
-
Set these values for Attribute Contract Fulfilment:
- For the Email attribute contract, select Adapter as the Source.
- For the Email attribute contract, select email as the Value.
- For the SAML_SUBJECT attribute contract, select Adapter as the Source.
- For the SAML_SUBJECT attribute contract, select subject as the Value .
- Click Next.
- Click through Next and Done, as the information is optional for the Issuance Criteria tab.
-
Click Next and Done.
You are redirected to the Browser SSO tab to configure bindings, endpoints, and other settings needed for the SAML profile.
Note: You can save the configuration at any time by clicking Save Draft. You can then retrieve it by selecting Manage All SP from SP Connections on the main administrative console page.
-
Adapter Instance: Select IdP Adapter
from the Adapter Instance menu and click
Next.
-
Click Protocol Settings in the Browser
SSO tab and complete the following tasks on each of the Protocol
Settings tabs.
-
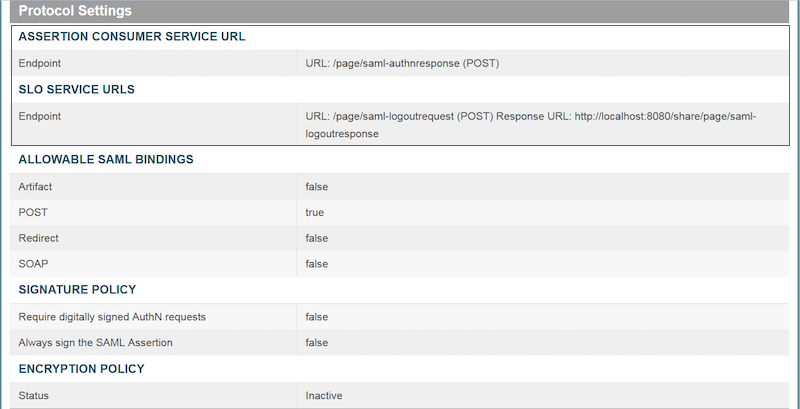
Specify information for the Assertion Consumer Service
URL:
For Share:
- Select POST from the Binding menu.
- Type /page/saml-authnresponse (POST) in the Endpoint URL field.
- Click Add. Click Next.
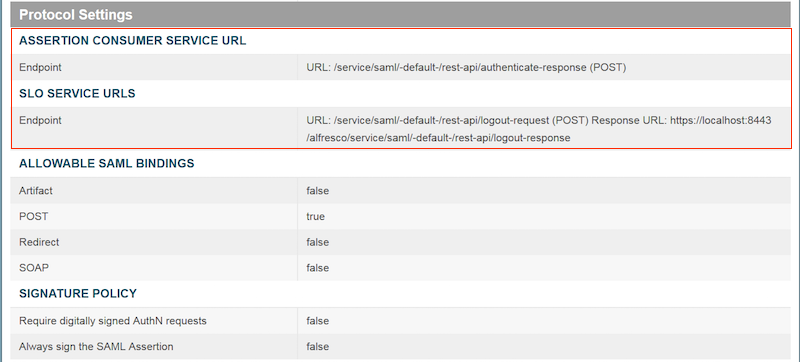
For REST API:
- Select POST from the Binding menu.
- Type /service/saml/-default-/rest-api/authenticate-response (POST) in the Endpoint URL field.
- Click Add. Click Next.
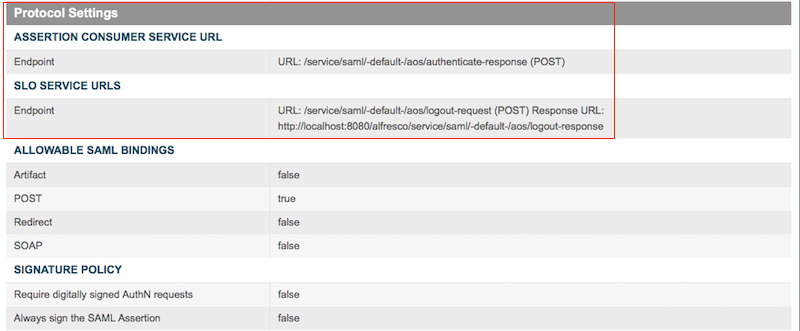
For AOS:
- Select POST from the Binding menu.
- Type /service/saml/-default-/aos/authenticate-response (POST) in the Endpoint URL field.
- Click Add. Click Next.
-
Specify information for the SLO Service URLs. These specify
where SkyVault receives logout requests when a Single Log-out (SLO) request is
initiated by PingFederate, and where PingFederate sends SLO responses.
For Share:
- Select POST from the Binding menu.
- Type /page/saml-logoutrequest in the Endpoint URL field.
- Type https://-your server-/share/page/saml-logoutresponse
in the Response URL field. For example:
https://localhost:8443/share/page/saml-logoutresponse
- Click Add. Click Next.
For REST API:
- Select POST from the Binding menu.
- Type /service/saml/-default-/rest-api/logout-request (POST) in the Endpoint URL field.
- Type https://-your server-/alfresco/service/saml/-default-/rest-api/logout-response in the Response URL field.
For AOS:
- Select POST from the Binding menu.
- Type /service/saml/-default-/aos/logout-request (POST) in the Endpoint URL field.
- Type https://-your server-/alfresco/service/saml/-default-/aos/logout-response in the Response URL field.
- Allowable SAML Bindings: Ensure that only POST is selected as the binding type. Click Next.
- Signature Policy: You do not need to select an option; just click Next.
-
Configure the Encryption Policy:
- Ensure that None is selected and click Next.
- Check the summary and click Done.
- Click Next.
- Review the final settings and click Done. You are redirected to the SP Connection > Browser SSO tab.
-
Specify information for the Assertion Consumer Service
URL:
-
Click the Credentials tab and Configure
Credentials and complete the following steps on each tab.
-
Digital Signature Settings: Download the PingFederate
certificate.
In the Credentials section, select Digital Signature Settings and Manage Certificates.
- Click Export for the IdP certificate that you require.
- Select Certificate only and click Next.
- Click Export, and save the file to a folder. Click Done.
On the Digital Signature Settings screen, select the signing certificate and the signing algorithm.
- Select the certificate from the drop-down list.
- Select the Signing Algorithm from the drop-down list. Make sure that the selected Signing Algorithm is RSA SHA256.
-
Signature Verification Settings: Specify the SP Certificate
used by PingFederate to validate SkyVault SAML messages.
- Select Manage Signature Verification Settings.
- Select the Unanchored option.
- Click Next.
- Click Manage Certificates.
- Click Import and Browse to select the SP Certificate that you downloaded from SkyVault and then click Extract.
- In a new browser window, log in to the Admin Console SAML SSO page as an
administrator.
http://localhost:8080/alfresco/service/enterprise/admin/admin-saml
where localhost:8080 is your SkyVault host name and port. - Click Download SP Certificate.
- Save the file.
- Click Next. The Summary screen is displayed. You can review or edit your credentials configuration here.
- When you finish editing the existing settings, click Done on the Summary screen, and Save on the Credentials screen.
-
Digital Signature Settings: Download the PingFederate
certificate.
-
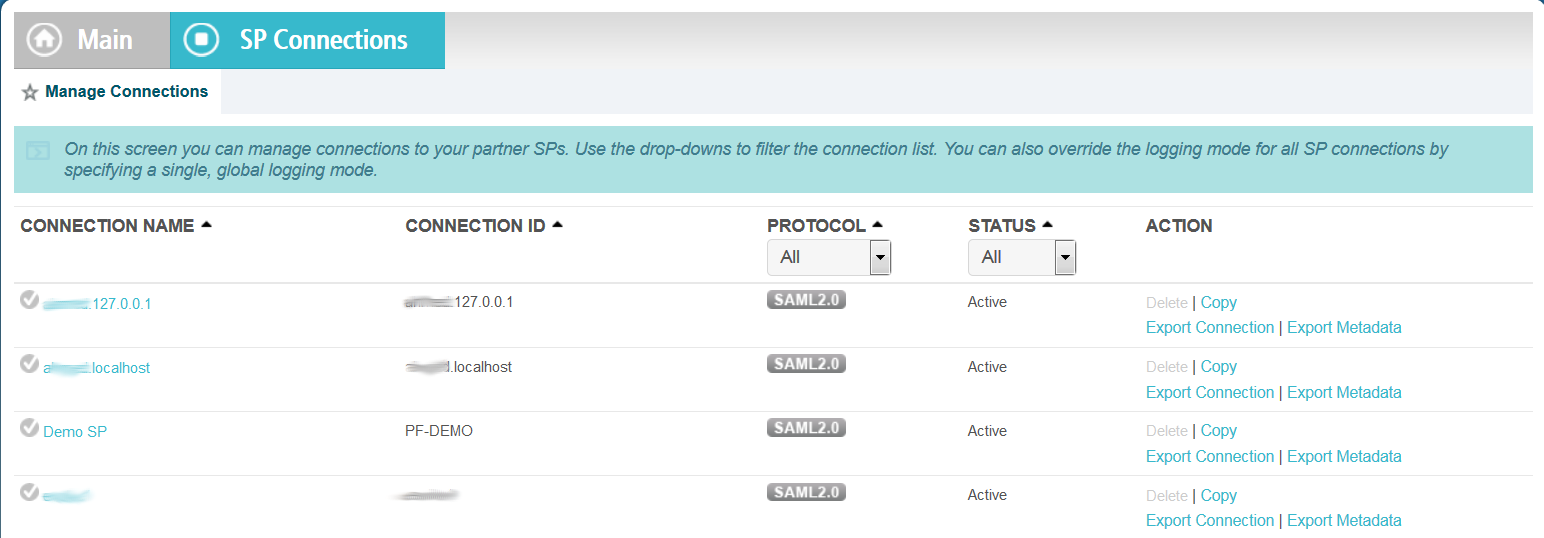
Ensure that your connection is active.
You can check your connection from the main administrative console. Select SP Connections > Manage All SP and scroll down to see the connection you created. Each connection has a status of Active, Inactive or Draft.
You are here
Configuring PingFederate manually
Configure your PingFederate identity provider manually to work with SAML SSO in
SkyVault.
Note: The following steps are example instructions to help you configure PingFederate.
For detailed configuration information see the PingFederate admin documentation.
If you have an existing PingFederate
connection that you want to edit and reuse for SkyVault, see Configuring PingFederate using a cloned connection.© 2017 TBS-LLC. All Rights Reserved. Follow @twitter
