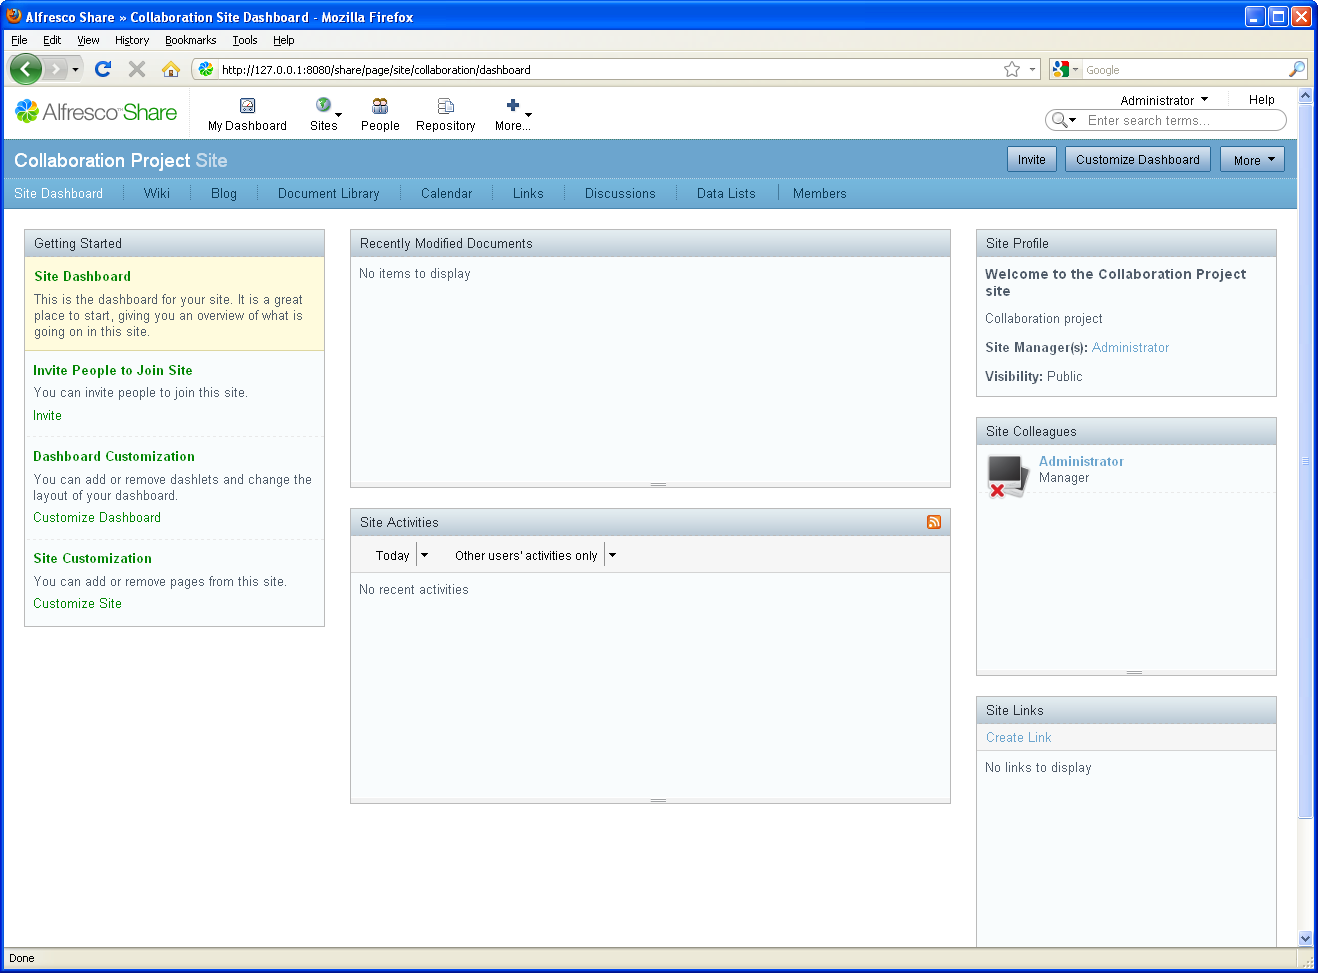
The next step in the scenario is to create a
collaboration site for your team.
From here, your team will be able to:
- Share and manage content
- Schedule and manage meeting events
- Have group discussions
- Write blogs
- Author content online and share with others via a wiki
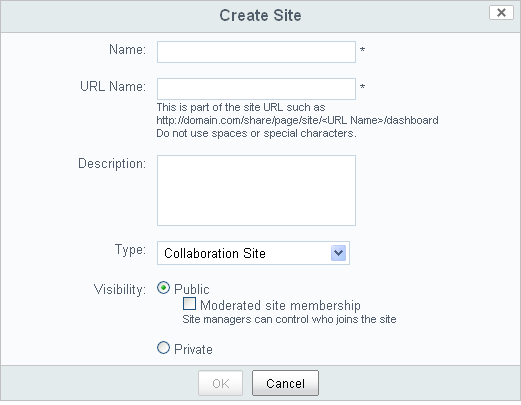
- On the application toolbar, click My Dashboard to return to your personal dashboard.
-
Click Create Site on the My Sites personal
dashlet.
-
Add the following information:
- Name: A descriptive name that will display as the title of your site. This is mandatory.
- URL name: A brief version of the name that is appropriate for a URL; it cannot contain any spaces or special characters. This is mandatory.
- Description: Information to distinguish your site from others in the My Sites list.
- Type: For this release, the only available site type is Collaboration.
- Visibility: A value that dictates users' access to the site.
Note: Your site has public access by default, meaning it is available to be viewed by all users, whether or not they join the site. In a private site, the Site Manager invites users to join. In a moderated public site, the Site Manager controls the membership by accepting or rejecting membership requests. -
Click OK to create and view your new
site.