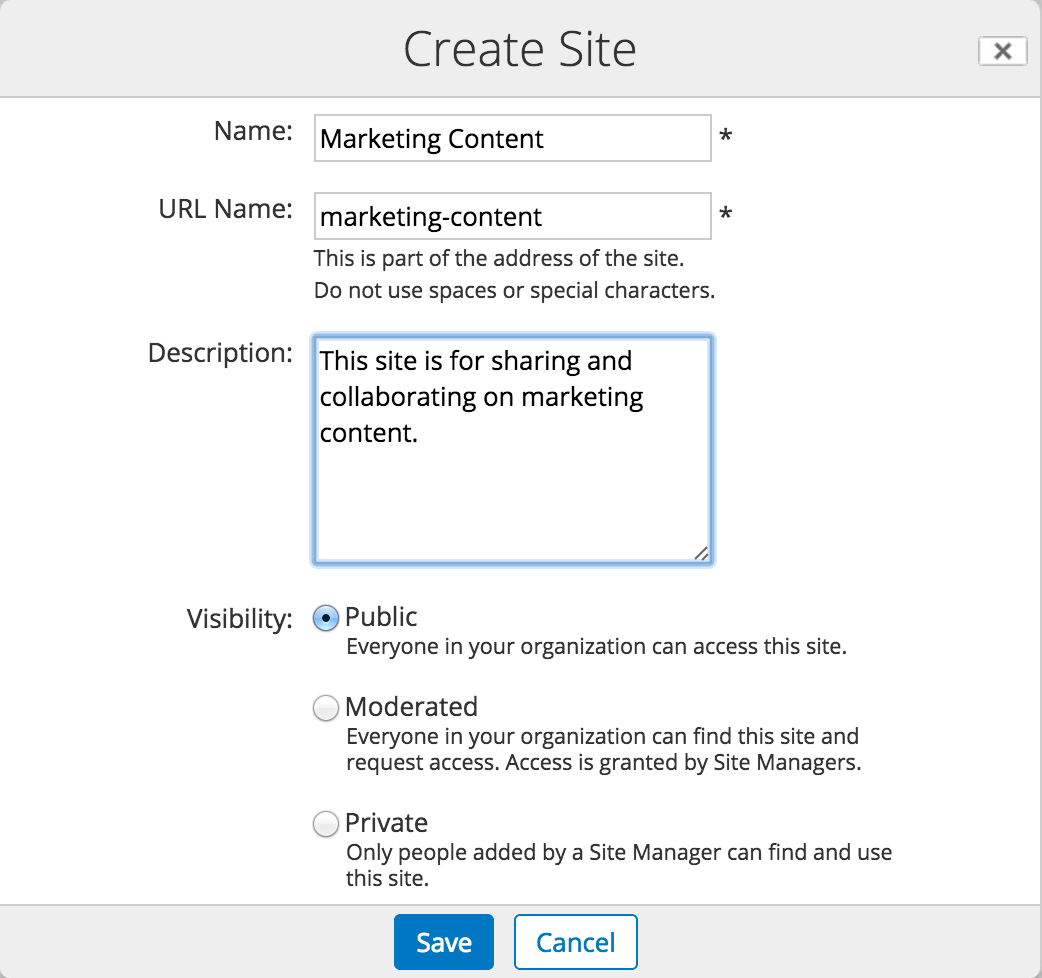
The first thing that you need to do is to create a site and choose its settings.
-
Click Create Site on the My Sites dashlet
or click the Sites menu at the top of the screen and select
Create Site.
Whichever method you choose will open up the Create Site dialog box.
-
Now enter site details as shown. You'll notice that the URL Name is automatically
created.
- Name: Marketing Content
- Description: This site is for sharing and collaborating on marketing content.
- Visibility: Public Note: By setting the site to Public all users in your organization can see and join the site. Selecting Moderated means that everyone can see it but a site manager has to approve requests to join. If you set the site visibility to Private, only users that you, the Site Manager, add to a site will be able to see and join the site. The visibility setting you select is displayed next to the site name when a user is in the site. See SkyVault sites for more information on site visibility settings.

- If you have modules such as Records Management installed, then there will be an additional Type option. Select Collaboration to create a standard site.
-
Click Save and the dashboard for your new site is now
shown.
Now that you've created a site, you can start to customize it, in much the same way as you did with your personal dashboard.
This video shows the steps in the tutorial.
