In this seven-step tutorial you will create a simple claims management solution.
You can use Smart Folders for any purpose where you want to bring together files from
across an organization, and apply metadata across a set of files. A good case study is an
insurance claim, where you might want to bring together information for one customer, that
relates to a claim and a specific policy.
Note: You will need system administrator rights to
perform the activities in this tutorial.
In the tutorial, you will:
- Import a custom content model and create a Claims Application folder where your Smart Folder structure will live
- Enable Smart Folders and the Type-based Smart Folder, and import the clex_claimFolder.json Smart Folders Template
- Create a rule to automatically apply the aspects for your Smart Folder structure
- Create a new claim
- Add some supporting files to your claim
- Apply a System Smart Folder to your Claims Application folder, to see how you can use different Smart Folder Templates together
- Link your claim to related policy files
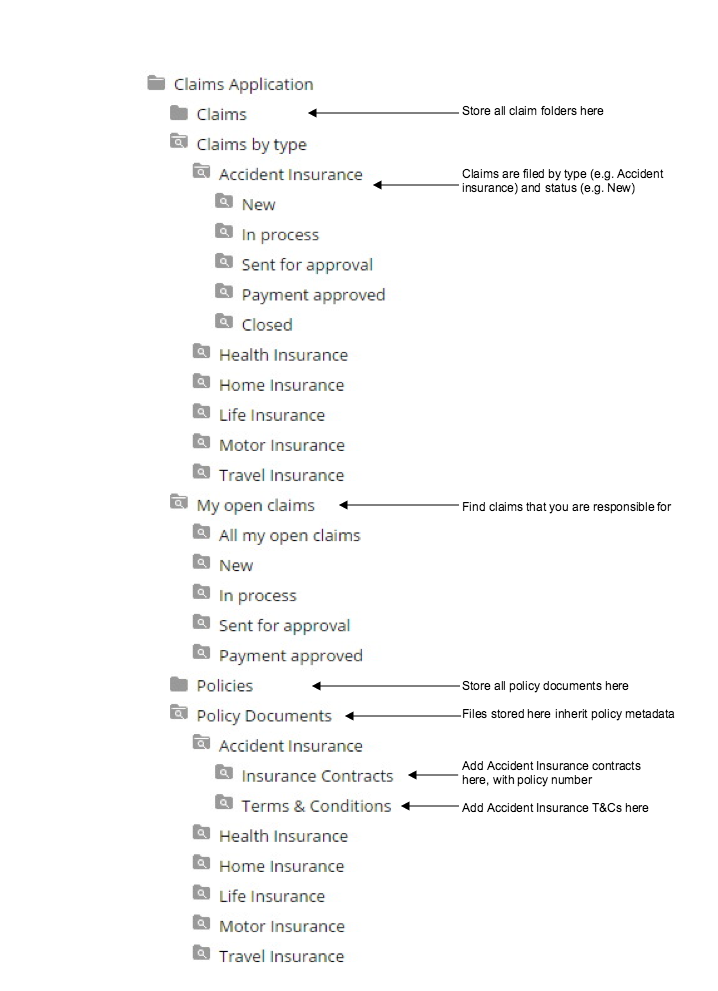
The diagram shows the final folder structure that you will create during this tutorial:

For background information on Smart Folder Templates, see What is a Smart Folder?
