Let’s presume you require research material for this
site. In this step, you create a separate folder in the document library to
contain this material and then add a document to the
folder.
To create a folder and upload content:
-
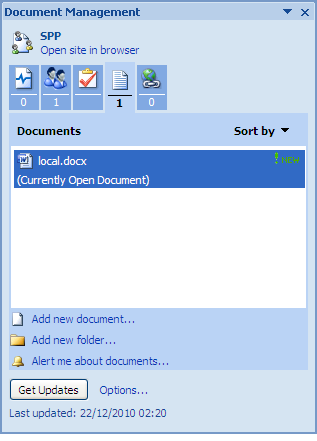
Open the Document Management task pane of the document local.docx
and select the Documents tab.
This tab displays the files and folders that currently reside in the site’s document library. From this tab, you can manage the contents of the Document Workspace.

- At the bottom of the task pane, click Add new folder.
-
Enter Research as the Folder
Name and click OK.
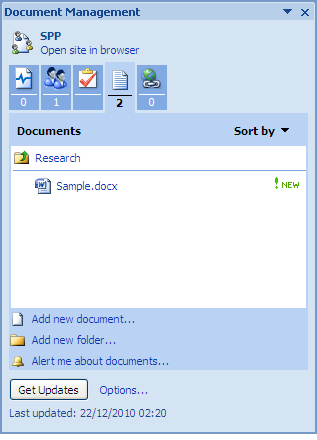
The newly created folder appears in the Documents list on the task pane. You can now upload a document to it.
- Select the Research folder.
- Click Add new document.
- Click Browse on the Add New Document dialog box.
-
Locate a Word document on your computer to upload and click
Open.
Note: The option Make workspace updates available when I open my copy enables you to create a link between this document on your computer and the copy being placed in the Share site. For this tutorial, do not check this option.
-
Click OK.
The document appears in the Documents list within the Research folder. The label New indicates the document has been recently uploaded.
 Tip: To remove a document from the Document Workspace, position your cursor over the document name, open the menu that becomes active, select Delete, and confirm the deletion when prompted.
 - In Word, close the document local.docx.
