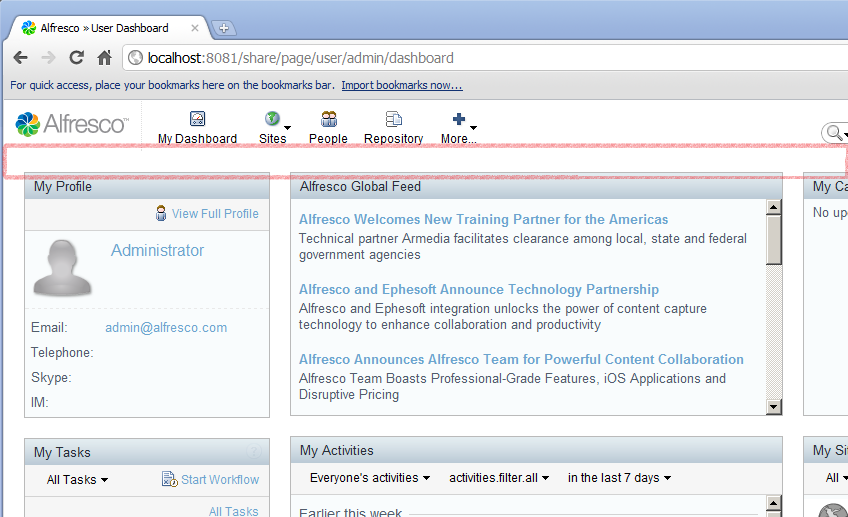
-
Add another <module> entry into the
<modules> element as follows:
<module>
<id>Blog Module (Hide Title)</id>
    <components>
       <component>
          <region-id>title</region-id>
          <source-id>user/{userid}/dashboard</source-id>
          <scope>page</scope>
          <sub-components>
             <sub-component id= "default" >
                <evaluations>
                  <evaluation id= "guaranteedToHide" >
                      <render> false </render>
                  </evaluation>
                 </evaluations>
               </sub-component>
           </sub-components>
          </component>
         </components>
</module>
Note that the source-id element uses a parameterized value. This will be discussed in more detail later in this tutorial.
-
Complete the following steps (they should be familiar from the previous
tutorial):
- Rebuild your JAR file.
- Copy your JAR file into the webapps/share/WEB-INF/lib directory.
- Restart the server.
- Open http://localhost:8080/share/page/modules/deploy in a web browser.
- If you still have Blog Module (New Content) deployed, undeploy it by selecting it and clicking Remove.
- Deploy Blog Module (Hide Title) by selecting it and clicking Add.
- Click Apply Changes to save your module deployments.
-
Log in to SkyVault Share. You will see that the titlebar no longer
displays.

Some features introduced in this tutorial are explained in more detail in the following sections:
Parameterized source-id mapping: Every SkyVault Share user gets their own dashboard page, which enables them to customize the layout to suit their own needs, but each user dashboard is generated from a single preset. In the previous tutorial, you targeted only the Admin user dashboard by extending the title region on the user/admin/dashboard template. In this tutorial you specify user/{userid}/dashboard. Note the use of the user variable. This allows you to change the appearance of the dashboard for any user, not just the admin user as was previously the case.
Extending existing Sub-Components: When the dashboard pages were first created, the concept of Sub-Components in Spring Surf did not exist. Consequently, if you search through the existing dashboard configuration files you will not find Sub-Components specified. Spring Surf automatically converts these "legacy" Components into the new extensible Components containing a single Sub-Component with the ID "default". These new extensible Components are called Advanced Components.
This allows you to add new content to these legacy Components through Sub-Components, or customize the original content without affecting any new content. In the previous configuration XML, you can change the behaviour of the components through modification of the default Sub-Component.
Note that multiple modules can extend the same Component, which is why the deployment order of modules is important.
Sub-Component evaluations: Every Sub-Component can optionally have zero or more evaluations. Each evaluation acts like an AND gate to a series of evaluators where an evaluation is considered successful if no evaluators fail. If an evaluation contains no evaluators, it is still considered to have evaluated successfully because nothing has failed.
The purpose of an evaluation is to change the behavior of a Sub-Component in one of three ways:- Change the web script that renders the content by specifying a new URL.
- Change the default properties (and/or provide new properties) that are passed to the web script.
- Control whether or not the Sub-Component is actually rendered.
Module deployment: It would have been possible to add the <sub-component> elements (and its children) into the module created in the previous tutorial, as a single module can update multiple Components and Sub-Components. Adding the configuration to prevent rendering of the titlebar as a separate module allows you to deploy and undeploy both extension modules independently. If you deploy both modules, you will see that both modules are active, with the new content is still rendered despite the titlebar itself not being rendered.
It is not necessary to restart the web server between module deployment changes. As long as you remember to click Apply Changes, the updates will show the next time you refresh the SkyVault Share page.
You are here
2. Control rendering of content on a SkyVault Share page
Building on the previous tutorial where you created and deployed an
extension module that added extra content to a user dashboard page in SkyVault Share,
this tutorial demonstrates how to use an extension module to prevent content being
rendered in a SkyVault Share page. This tutorial also shows how to use evaluations to
decide whether a component should be rendered or not.
The module in the previous tutorial added content to the titlebar on the user
dashboard. This tutorial writes a module to hide the titlebar. As the same component is
being targeted as in the previous tutorial, values for region-id,
source-id, and scope properties can be reused,
rather than having to obtain these values for the new target component using
SurfBug.
© 2017 TBS-LLC. All Rights Reserved. Follow @twitter
